Last night was a blast! It was the annual holiday party at my parent’s house, and this year’s theme was Cards and Curds. We had card games going (big money on the line!), and the party wouldn’t be complete without our traditional eight foot cheeseboard.
Yep.
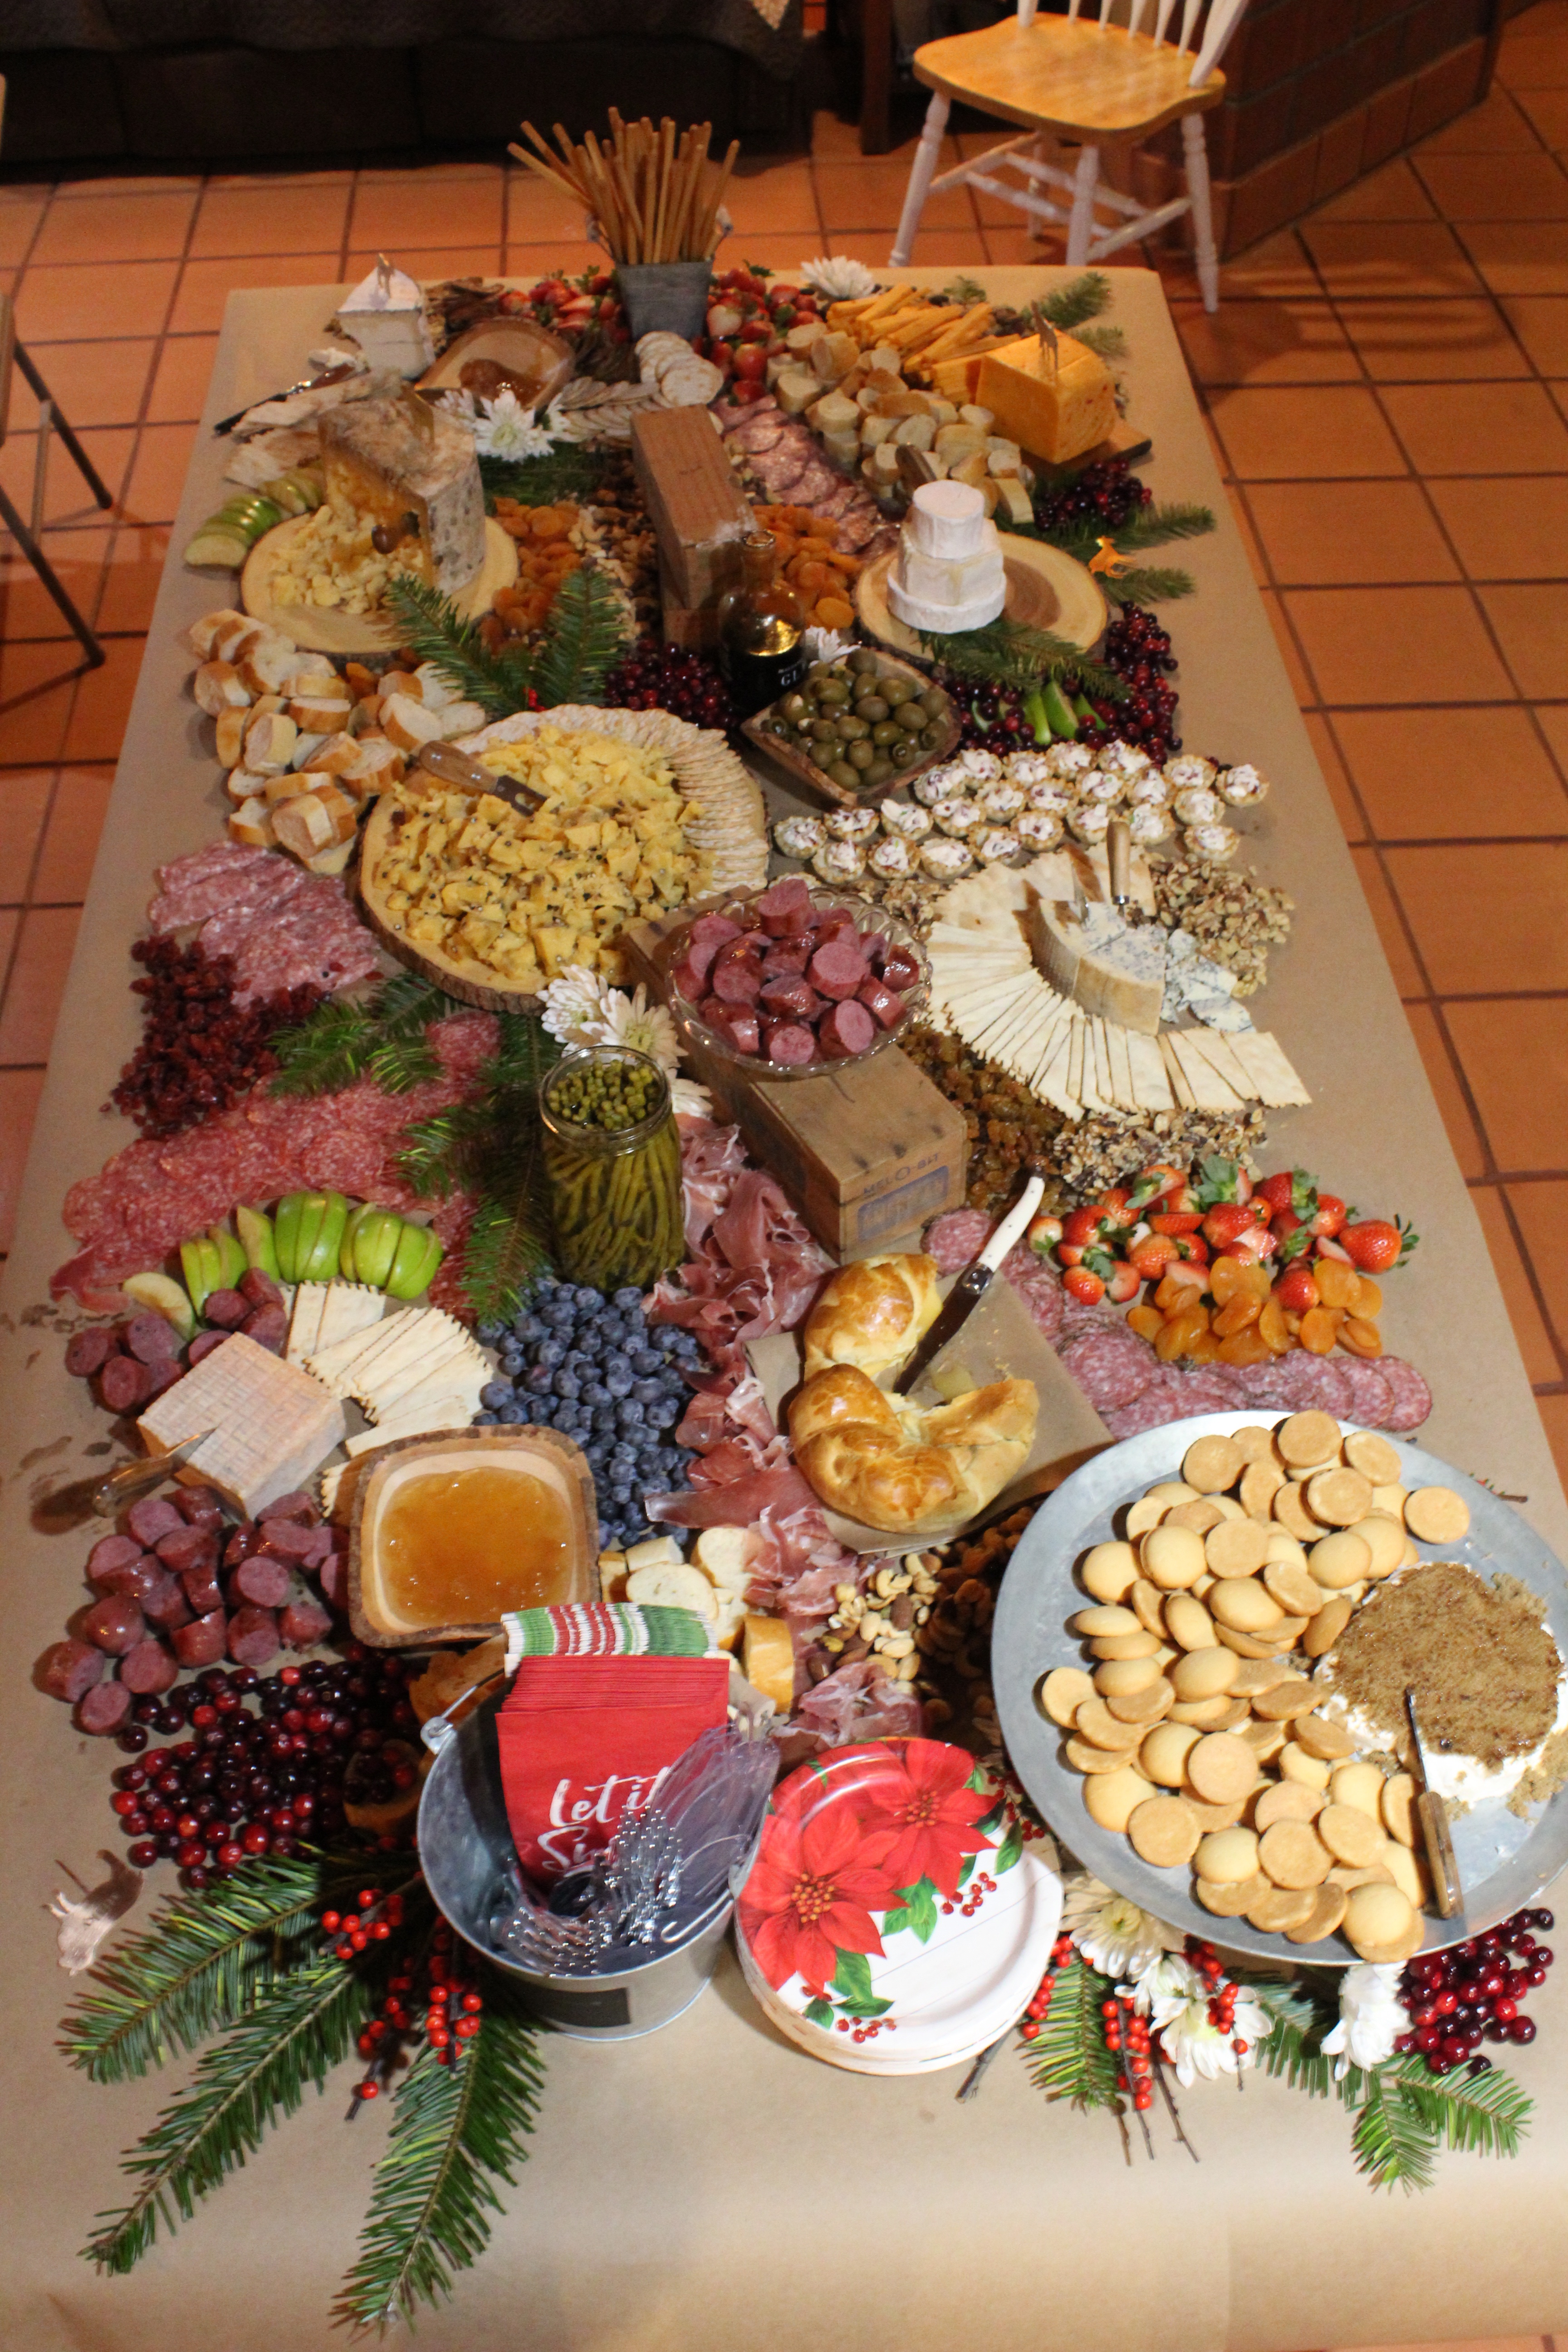
Eight feet of cheese, meat, and bread.
Does it get better than that?!
Short answer: no.
I look forward to prepping this board for weeks in advance. My creativity runs wild, I get to spoil my family with an array of delicious foods, and most importantly, I get to highlight some great cheeses (usually my favorites!). While the end product is a beautiful masterpiece, there is no shortage of planning and work that goes into it. Any sized cheeseboard can be an undertaking, so I wanted to share my tips on how I get my boards ready. Cheeseboards make a great addition to any party of gathering, so let’s get to building!
- Plan. And then plan, plan, plan. I’m neurotic so I might over due this one a bit, but it works! I sketch what I want my board layout to be, complete with the names/types of cheese that will be on display. I also make notes of the accoutrements I will be filling space with. I try to pick a side or two that pairs well with each of the cheeses, and place those near that particular cheese. Also, note what your serve-wear and plate-wear will be. (See, lots of planning to do!)
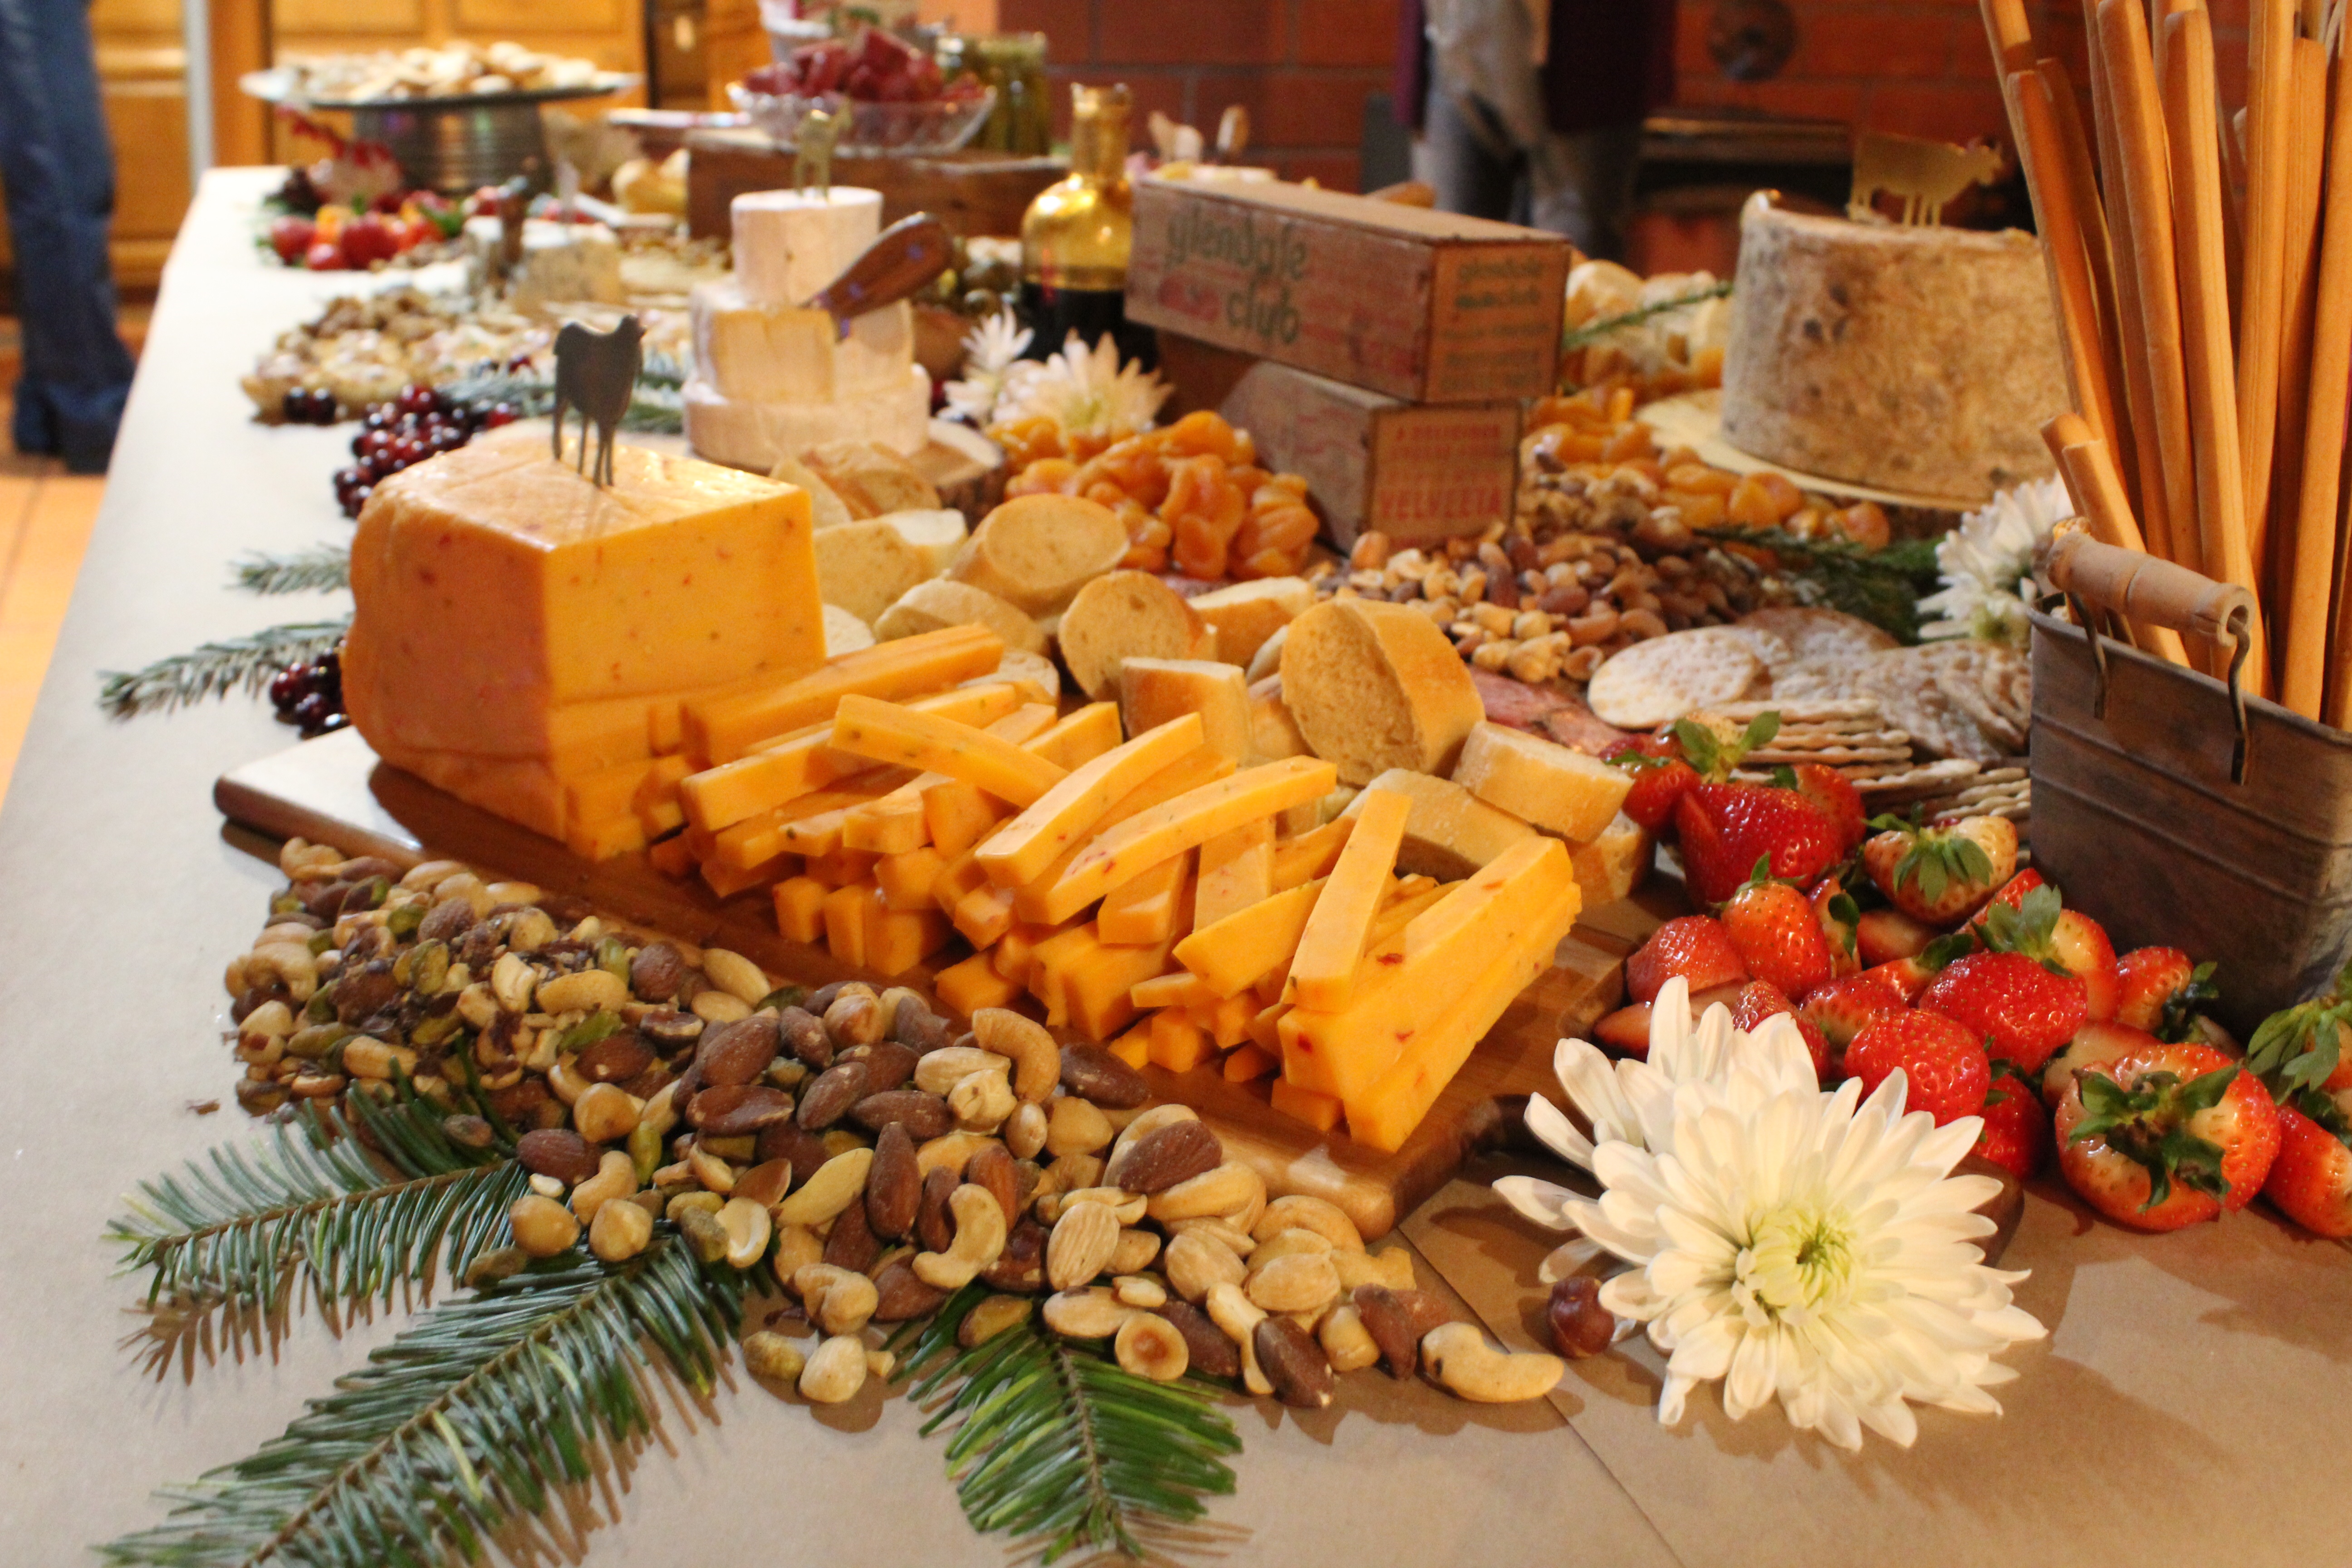
- Pick a few of your favorite cheeses, and make sure to slot them a space on the board! When it comes to choosing your cheeses, make sure to mix and match different textures, milks, flavors, and varieties. A few that are always on my board: Brie, a blue cheese, dry jack, aged cheddar, a goat-milk cheese (typically Cypress Grove because it is light and mild). I highly recommend going to a store with a full cheese counter so you can talk to an educated clerk, and taste the different cheeses. I love talking to the cheese clerks and getting their recommendations and favorites!
- Do your shopping over a period of time. (This year I actually divided it up among a couple of us.) It sounds silly, but this can get really overwhelming. And expensive, if you’re not careful! I recommend collecting as much as you can from your family. No, don’t break in and steal their crackers, but if you’re fortunate like I am your family makes homemade sausage, jam, pickled asparagus, has fruit trees, and so forth. I also recommend visiting the Winco bulk bins for your dried fruit and nuts, and Grocery Outlet for miscellaneous crackers, jam (if you don’t have homemade available), honey, fruits, and specialty meat (yes, you can find prosciutto here!).
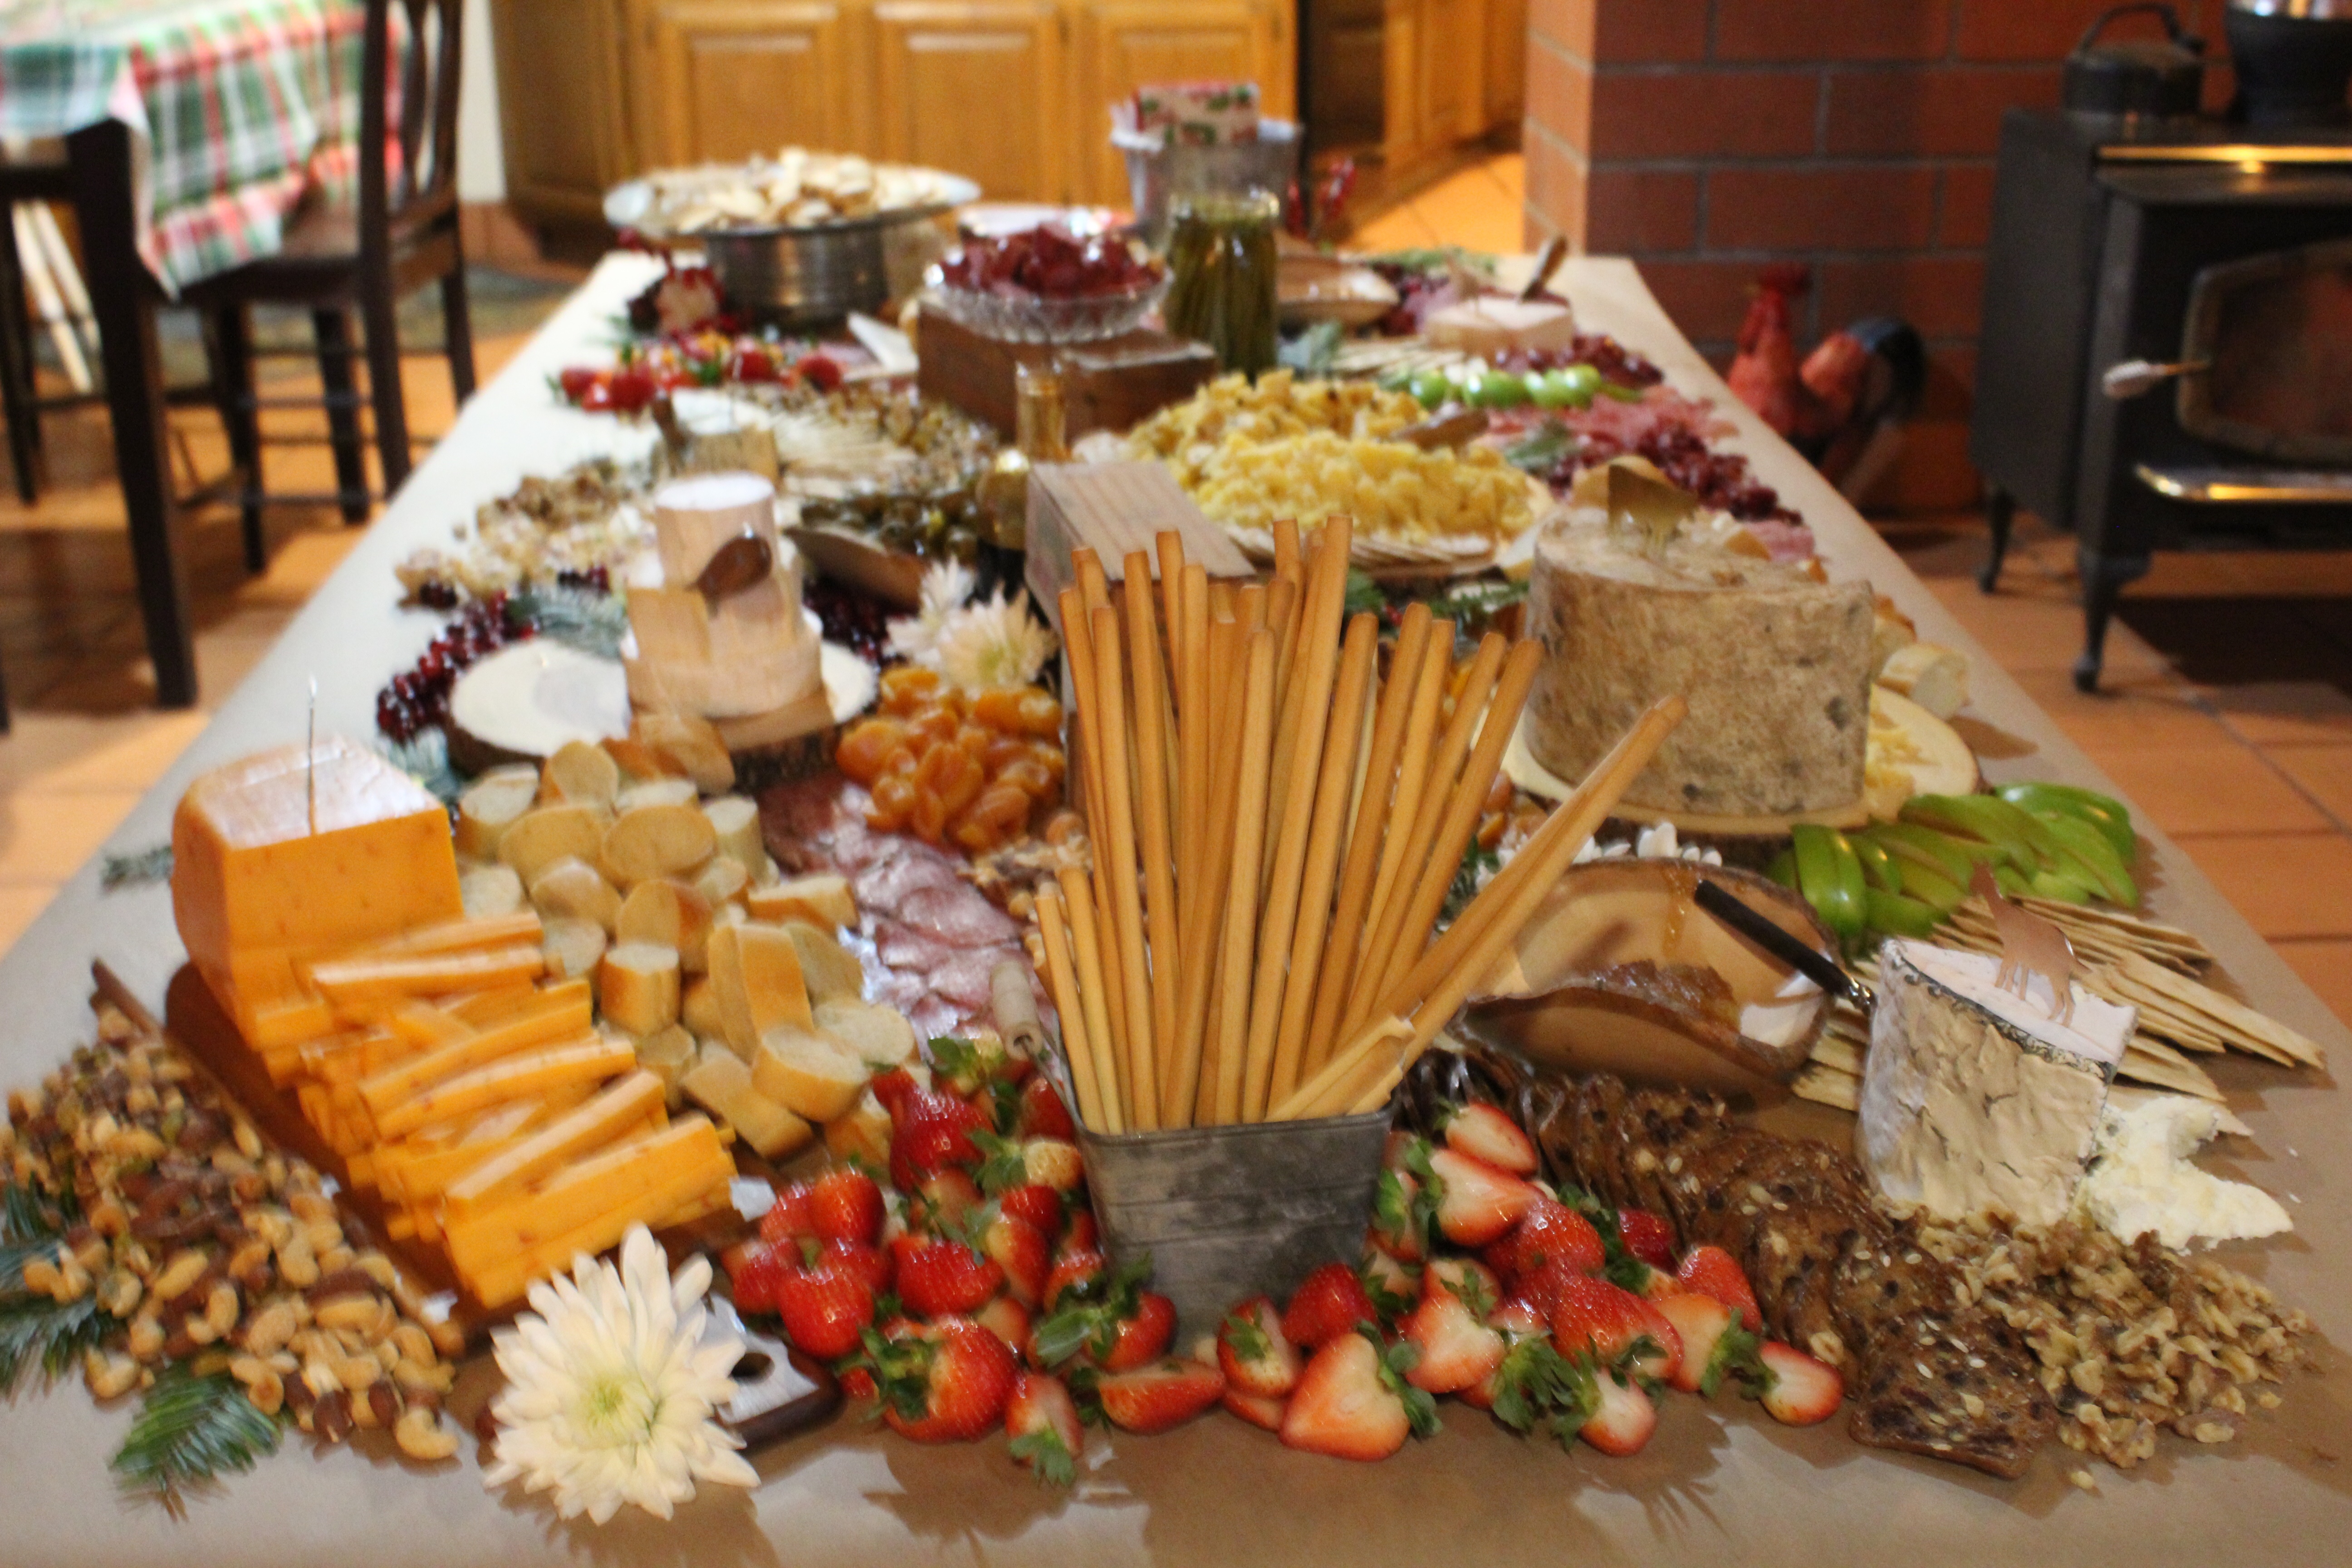
- If you’re doing a full table, and not just a board, invest in some brown Scotch butcher paper. I roll this out right onto the table so I start with a clean palette (I like the simple, clean look), and it allows me to put cheese, meat, and all the goodies right on the table.
- Make a schedule to structure your day, and give yourself enough time to build your board out. I rested easier this year knowing what cheese I needed to prep, and approximate times I should start staging the various phases of the board (okay, neurotic). Even though I didn’t follow it to a “t”, having a plan kept me more relaxed.
- Prep any cheese that you can (I had my mom help me crumble all the dry jack and peppato) as well as your bread, fruit, and vegetables ahead of time. During some free time yesterday I cut all my bread and put it in a couple ziplock bags, so when the time came all I had to do was open the bag and dump! I did the same with the apples and strawberries. This made set up much quicker and easier.
- Set your board up in phases. I roll my paper out, stage my plate-wear and serve-wear, and then slowly add the crackers, bread, nuts, fruit, and lastly the cheese. I take a little rest between each so I don’t get overwhelmed, and come back to it with a set of fresh eyes.
- Don’t turn down help!! I learned this the hard way. I have my family help me on the prep-side and on the backend, so my time is free to do all the placement.
- Get your cheese to the right temp. Cheese should be eaten at room temperature (yep!). So make sure you set your cheese out with enough time to warm up before your guests arrive.
- Don’t be afraid to try new things! I always like to add a little cheese dish in addition to chunks of cheese (baked Brie, puffed pastry, or cream and goat cheese wontons).
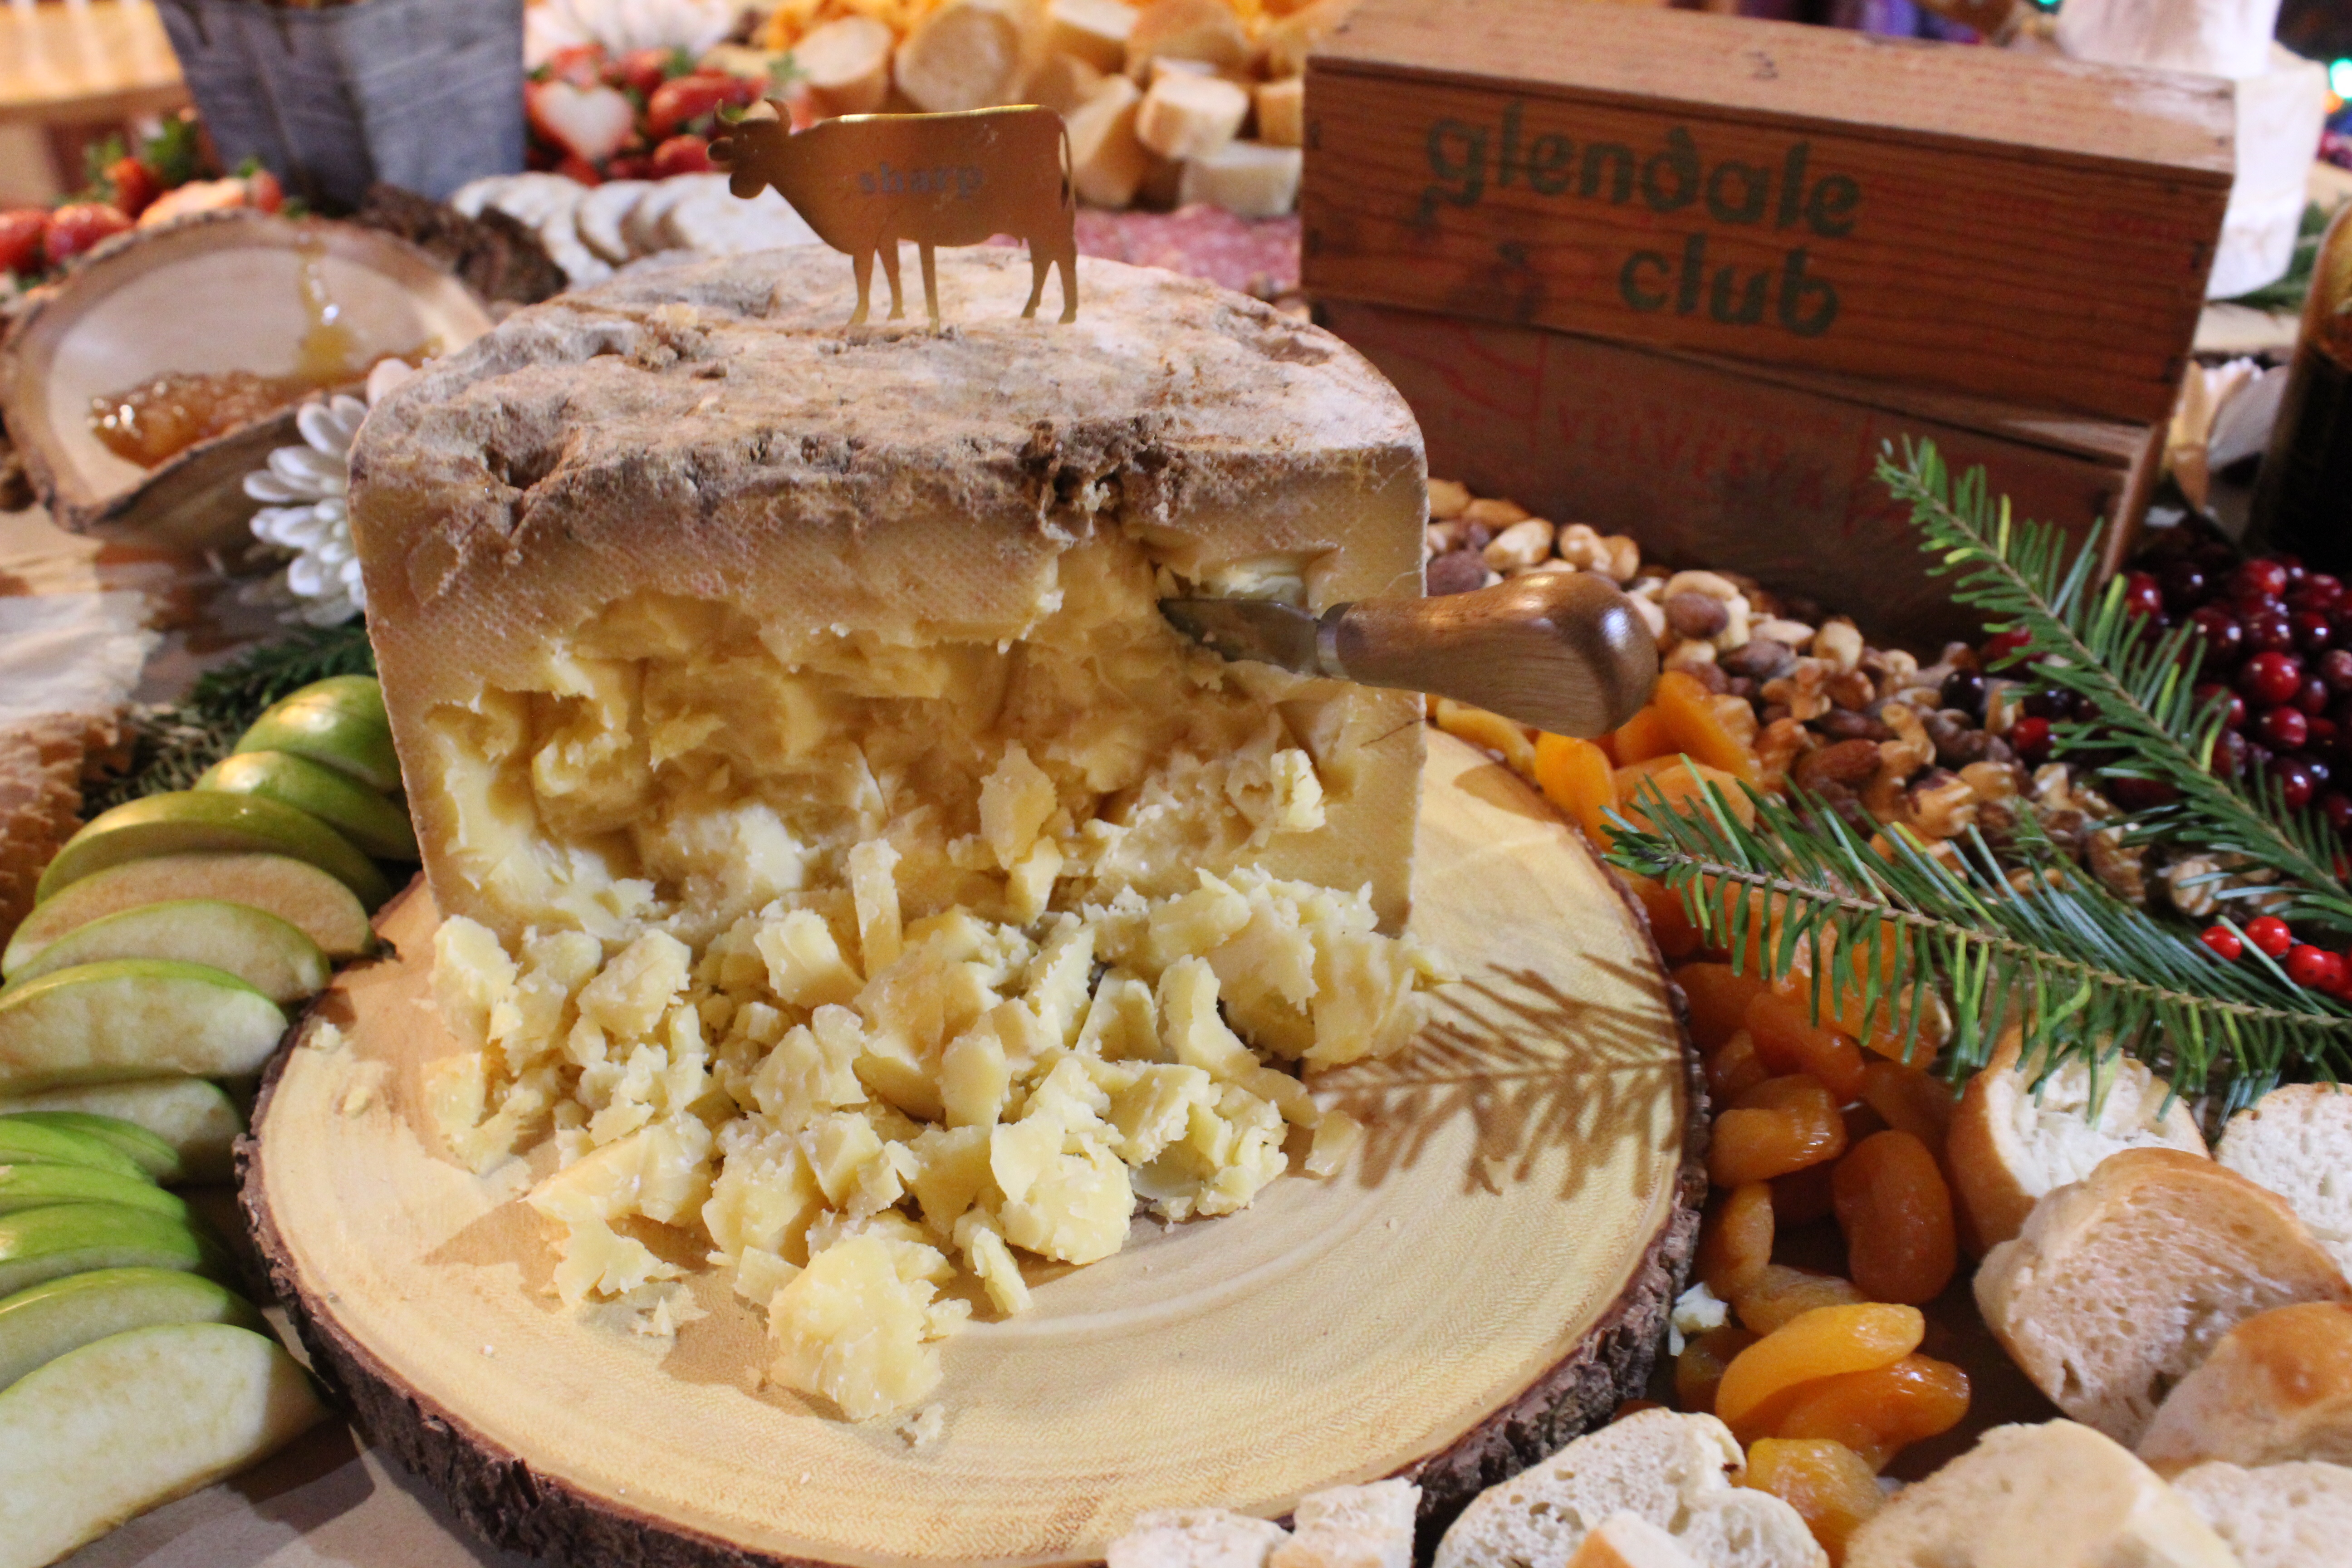
- Invest in a set of cheese knives. CRITICAL! Each cheese and dish should have their own utensil. Different cheeses have different style knives for a reason! Do some research and get familiar with your knives.
- Get your cheese snack-ready. Once your cheese is on the board, use your cheese knife to crumble a few chunks of each cheese, so people have an idea of how they’re supposed to eat it. If your cheese doesn’t need to be crumble or broken off the wheel/block, cut it up. This usually pertains to your semi soft cheeses (blocks of cheddar, jalapeño jack, Monterey Jack, etc.). If you have more than one of these on your board, make sure they’re different shapes. Do some in sticks, some in slices, some in triangles, etc. You can also play with display and placement of the pieces to make your board unique.
- Take notes and gain inspiration from other people’s boards! I follow a few Instagram accounts that help give me new ideas and fuel my love of cheeseboards (seeing their beautiful boards is also a pick me up on a rainy day). The accounts I follow are: @cheesebynumbers and @thatcheeseplate.
Cheese on this year’s board:
- Cypress Grove’s Ms. Natural
- Taleggio
- Reny Picot Baked Gouda
- Rumiano Dry Jack and Peppato
- Facerock Clothbound Cheddar
- Cypress Grove’s Humboldt Fog
- Rumiano Redwood Coast R&D smoked jalapeño cheddar
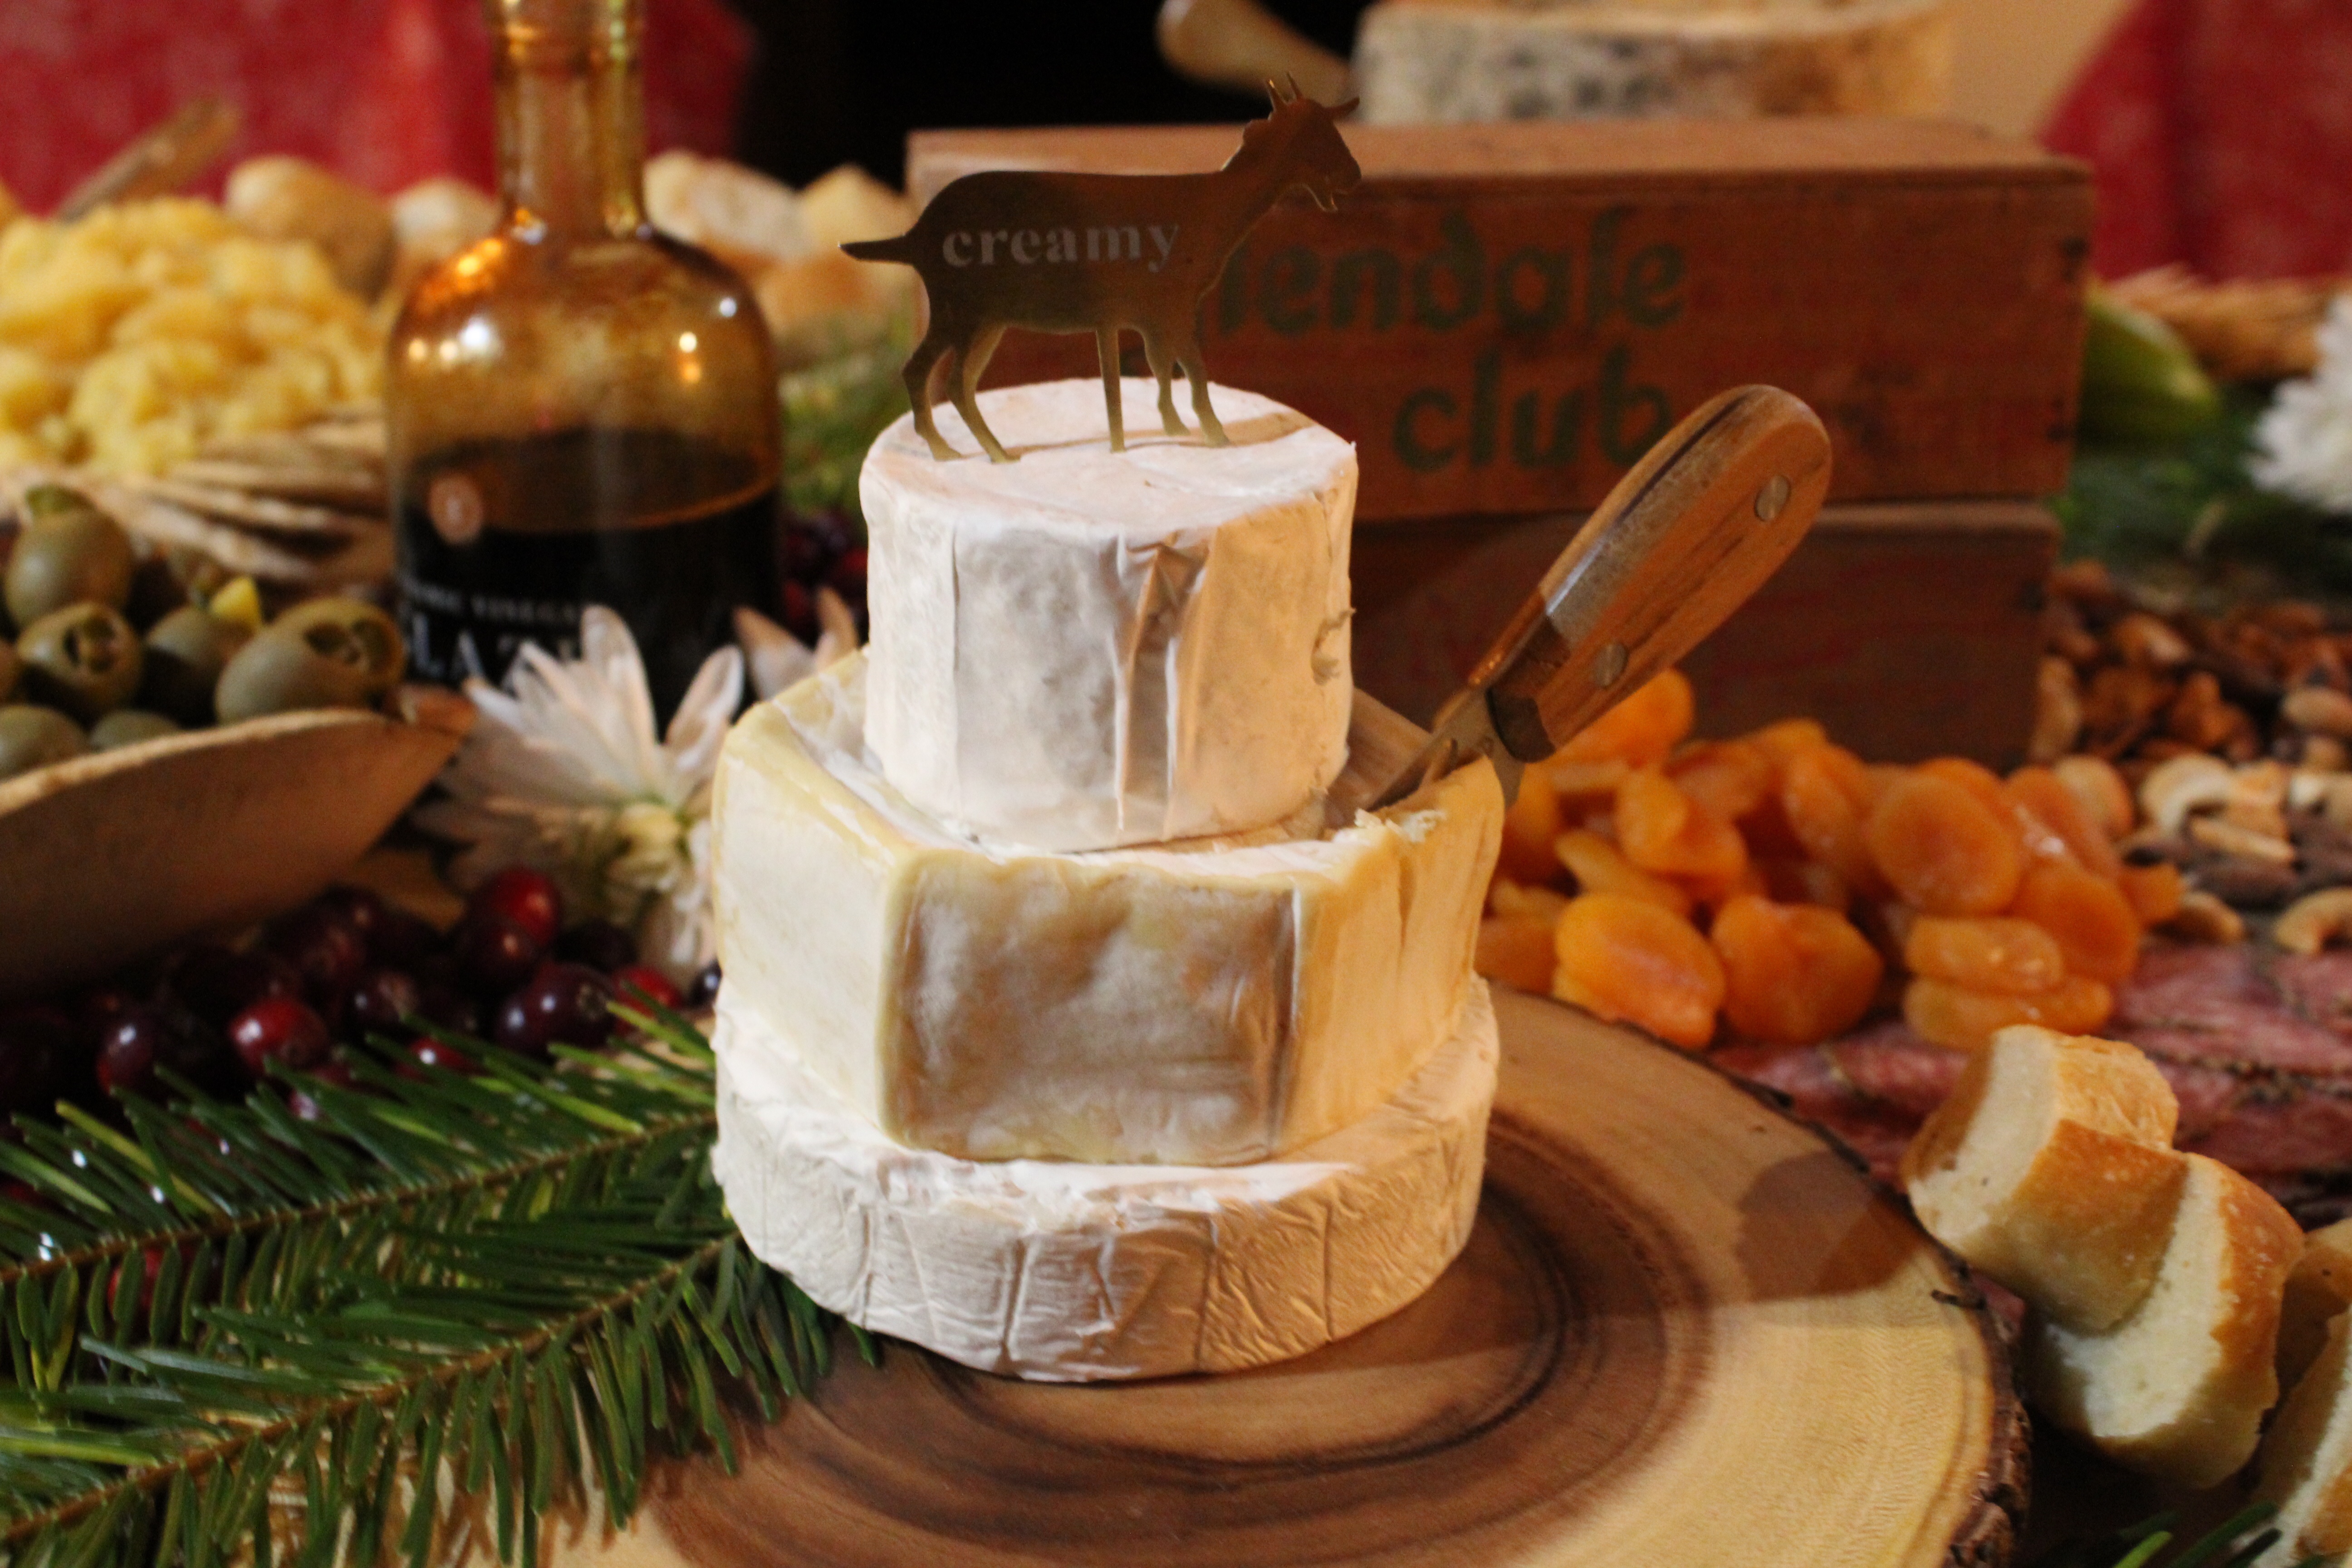
- Soft-ripened cake (Brie, Camembert)
- Point Reyes Bay Blue
- Cream and goat cheese wonton-style snack bite. (I sort of made the recipe up, so it is nameless, but delicious!)
Board accoutrements:
- Nuts (almond, walnut, mixed)
- Dried fruits (apricots, cranberries, figs, raisins)
- Fresh fruit (strawberries, apples, grapes, figs, cranberries)
- Vegetables (I don’t always add vegetables, it depends on the board and time of year, but carrots, broccoli, peas, and cauliflower can be colorful additions.)
- Greenery and flowers
- Old cheese boxes, cake plates, jars, tons, bowls, dishes.
- Crackers (water crackers, flavored, a mix of shapes and sizes)
- Bread (fresh! And a mix of types.)
- Olives
- Jam (I prefer homemade)
- Pickles asparagus (I steal my auntie’s!)
- Honey
- Basalmic glaze
- Meats (I love our family’s homemade sausage. From there I pick a variety of meats, with different flavors and spiciness.)
Favorite things about this year’s board:
- I added more greenery (Christmas-themed of course).
- I created my first-ever soft-ripened cake!
- Our family’s homemade sausage made an appearance.
- A completely full board with no holes! (Aka, no open space on the board.)
- More options for pairing (greater variety of fruits, nuts, crackers, etc.)
- Better serve-wear and plate-wear for the cheese. It is a good way to add height and texture diversity.
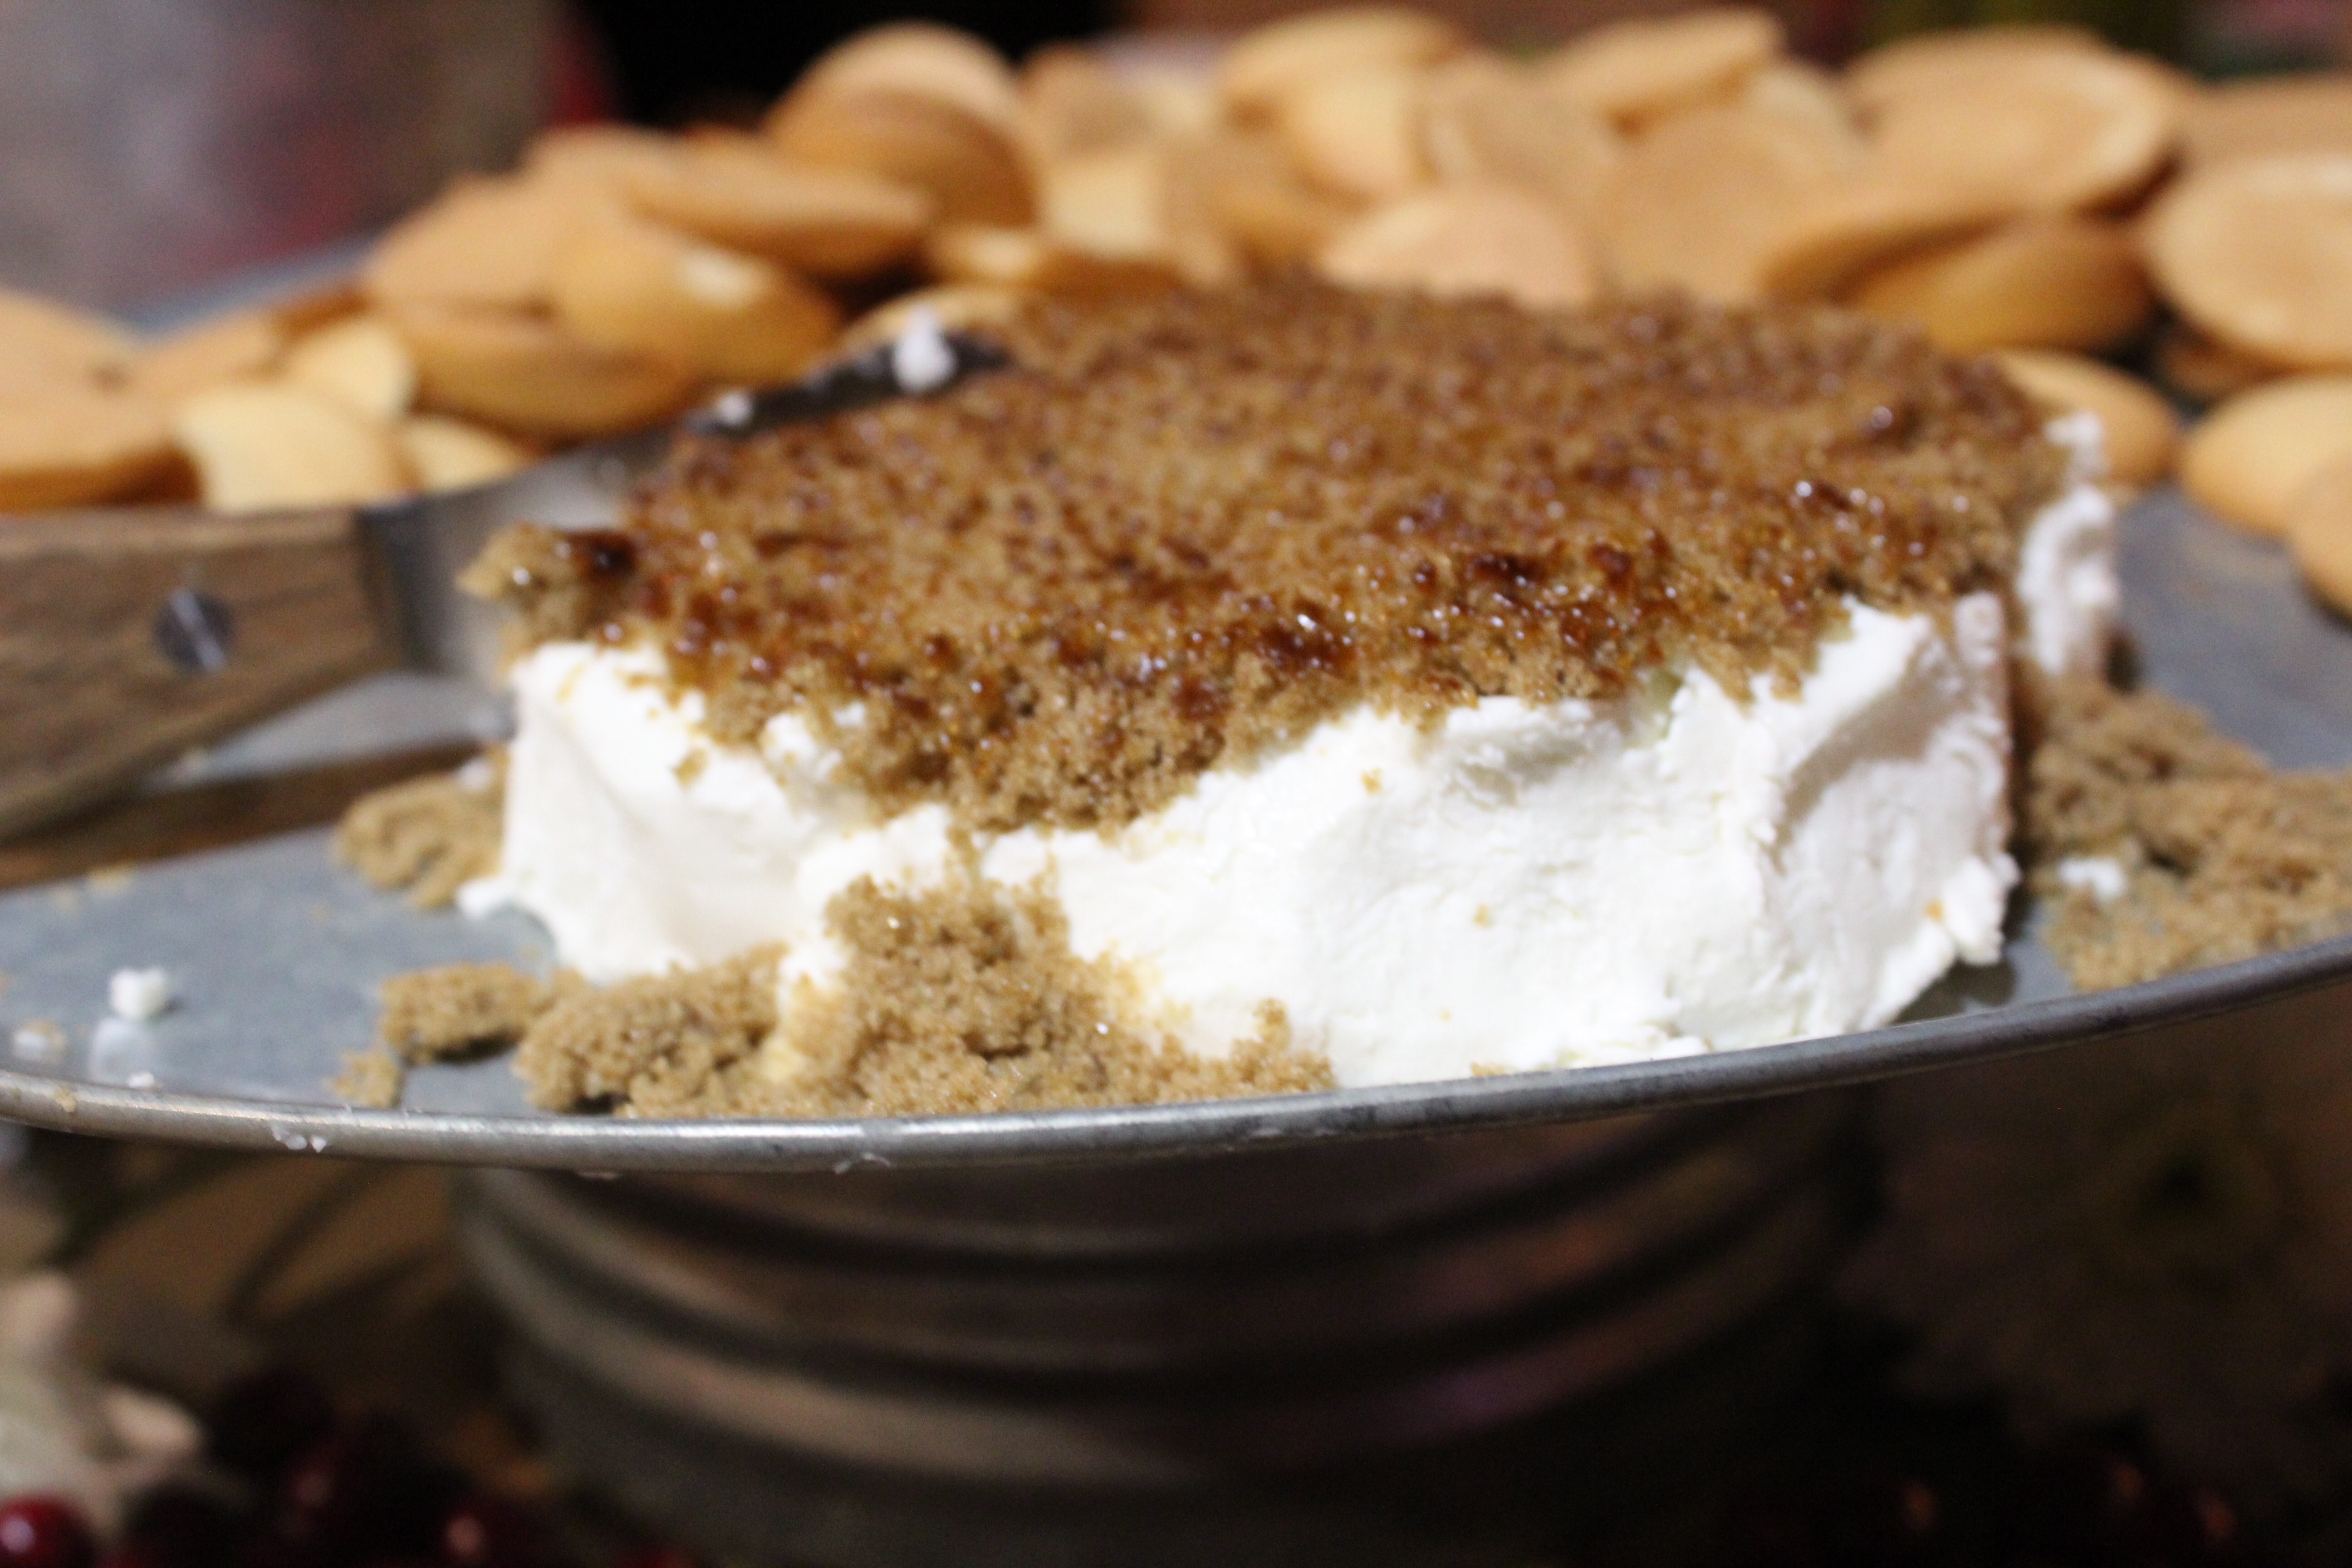
- A dessert cheese! I took Cypress Grove’s Ms. Natural, sprinkled it with brown sugar, toasted it, and paired it with Nilla Wafers…
- A baked Gouda made a presence!
- Tested out a cream and goat cheese wonton-style snack bite.
I hope these tips and notes are helpful! Get creative, try new things, and mostly have fun! The possibilities are endless for cheeseboards, don’t be afraid to take risks. I love looking at other people’s creations, please tag me in yours! Enjoy, and eat well.
